
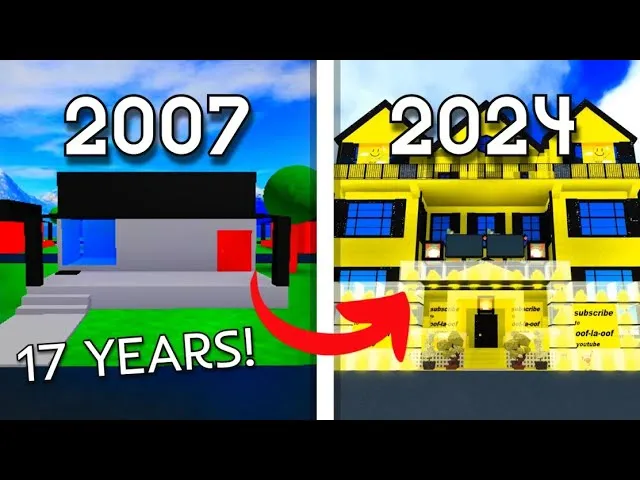
Most players never realize the ocean surrounding the main island is fully explorable. The detailed water setting in this game transforms a flat, decorative shoreline into a navigable surface, and once you activate it, every dock, beach, and outcrop becomes a launchpad for a full island tour. The setting also unlocks the hang glider, the only way to cross long stretches of water without a boat, which is why veterans rely on it for the glide path to Rock Island. This guide walks through the toggle, the swimming distances, the hang-glider wind windows, and how every named island and house lot fits onto the expanded map.
What the Detailed Water Setting Actually Changes
The water setting lives inside the in-game options panel and is disabled by default to keep new players anchored near the pizzeria. Flipping it on swaps the static shoreline mesh for a deeper ocean plane, raises the water level by roughly one character height, and adds Swim, Dive, and Glide actions to your movement bar.
| Setting State | Water Plane | Swim Action | Hang Glider | Boat Spawns |
|---|---|---|---|---|
| Default (off) | Decorative, no collision | Hidden in UI | Hidden in UI | Disabled at docks |
| Detailed (on) | Full collision, wave physics | Visible + bound to Spacebar | Visible + bound to Shift | Enabled at both docks |
According to the community map wiki, the detailed water plane is the same mesh that backs the beach around the main island, but extended outward by several hundred studs. That extension is what allows mid-ocean swimming without falling through the world. Players who toggle the setting on for the first time consistently report that the far water horizon looks darker and that wave audio loops play continuously — both are signals the deeper plane is loaded.
How the Setting Stays Active Per Server
The toggle is per-session, not saved to your account. Each time you join a new server, the setting resets to default. Veterans get around this by joining a populated server, opening the menu, and rebinding Swim to mouse wheel scroll and Glide to right-click before they leave the spawn area.
Why the Setting Matters for Map Discovery
Without it, the ocean is a wall. With it, the ocean becomes the map. The 12 player houses (numbered A1 through C3), Party Island, Rock Island, and the Secret Tunnel entrance are all reachable by water once the toggle is on. The setting is the difference between knowing the pizzeria and knowing the whole island tour.
Swim Distances, Stroke Speed, and Stamina Drain
Swimming is slower than walking but faster than most players expect. The base Swim Speed is roughly 14 studs per second when pressing the forward key, dropping to 9 studs per second when only holding the swim key without directional input. There is a soft stamina meter that begins draining after 12 seconds of continuous swimming, which means the longest single crossing needs to be planned.
| Route | Distance (Studs) | Swim Time | Stamina | Notes |
|---|---|---|---|---|
| Main dock to Party Island | ~280 | 20 sec | Light | Easy first crossing |
| Party Island to Rock Island | ~620 | 44 sec | Heavy | Plan a mid-swim pause |
| Main dock to Rock Island (direct) | ~830 | 59 sec | Max | Hang glider strongly recommended |
| Backyard beach to Secret Tunnel mouth | ~210 | 15 sec | None | Shortest swim in the game |
| Main island south shore to far reef | ~410 | 29 sec | Medium | Hidden drop spot |
Stamina recovers the moment you stop pressing the swim key, even if you are still treading water. Skilled players use a burst-glide pattern: swim for 8 seconds, deploy the hang glider for 6 seconds to coast and recover stamina, then drop back into the water and resume. This is the technique that makes the direct 830-stud crossing to Rock Island possible without a boat.
Stroke Direction Tricks
The water plane has a mild current that drifts players northeast by about 2 studs per second. Beginners who try to swim straight toward Rock Island from the south dock usually end up landing on a nameless sandbar. Compensate by aiming roughly 15 degrees southwest of your target and letting the current correct your path. This single adjustment saves around 20 seconds on every long crossing.
How to Glide to Rock Island Step by Step
The hang glider is the fastest and safest way to reach Rock Island, and the only method that does not require a mid-ocean stamina pause. Below is the full sequence veterans use to chain the glide to Rock Island from the main dock.
Step 1: Activate the Detailed Water Setting
Open the in-game menu, navigate to Settings → Movement → Water Detail, and switch it from Off to Detailed. Confirm that the Hang Glider toggle is also set to Enabled before closing the menu, since the glider's lift coefficient and the water renderer's reflective surface shaders are both required for the glide-to-Rock Island path along Houses A1 through C3. Without the Detailed setting, splash particles and wave displacement are disabled server-side, which forces the Hang Glider to clip through the delivery map numbered zones between the islands. The toggle only persists per-account, so re-logging via the alt-account dock won't reset your progress, but joining a friend's lobby as a passenger will revert your visual preset to Off until you re-enter Settings solo.
Step 2: Walk to the South Dock Ramp
From the spawn area, head to the south side of the main island. The dock ramp is a wooden slope that descends from the parking lot to the water line. The launch point is the very tip of the ramp, where the wood ends and the wave mesh begins.
Step 3: Enter the Water to Trigger Swim Mode
Walk off the ramp's edge and press the swim key (default Spacebar) the moment your character hits the water. You should see the swim animation start and the camera lower slightly. This confirms the water plane is active, and the Surfboard item equipped in your inventory slot will automatically attach to your character's feet, which is required before you can glide toward Rock Island. If the animation fails to trigger, recheck the Water Settings toggle in the lobby configuration—without it enabled, the water plane renders as solid geometry and your character will simply fall through into the void below the map.
Step 4: Swim Out 40–60 Studs Before Deploying
Do not deploy the glider immediately. Swim outward until you are clearly past the dock pilings, roughly 40 to 60 studs offshore. Deploying too early clips the glider into the dock geometry and you fall straight back into the water.
Step 5: Deploy the Hang Glider and Aim Northeast
Press the Glide key (default Shift). Your character will lift off the wave plane and the camera will tilt upward. Steer with the mouse; the correct heading is roughly 30 degrees above the horizon, aimed at the tallest rock spire in the distance. That spire is Rock Island.
Step 6: Coast Across the Open Water
The glider covers about 18 studs per second in still air, and the offshore breeze adds another 2 to 3 studs per second when you cross the 200-stud mark. A clean glide from the south dock to Rock Island's eastern landing pad takes about 35 seconds, with stamina fully recovering during the coast.
Step 7: Land and Trigger the Rock Island Cutscene
The landing pad is a flat stone platform on the east side of Rock Island, with a glowing purple ring in the center. Touching the ring starts the cutscene that unlocks the Rock Island Chest and the revival altar. Players who miss the pad and land on the rocks can climb up by jumping along the lower ledges.
The full map guide details the entire glide path alongside every other navigation method, from the Bloxy Cola balloon to the driftboard launch ramps and pizza delivery scooter routes. It serves as a useful companion for chaining multiple island hops in a single session, with detailed screenshots and step-by-step directions.
The Full Island Tour: Every Named Island on the Map
With the water setting active, the playable world opens up to four named islands plus a handful of half-submerged landmarks that only surface when the tide graphic renders. Below is the complete tour, ordered from closest to the spawn point to farthest offshore, so delivery drivers can plan a hang glider launch angle from the Pizzeria roof at roughly 70° elevation before the mainland houses (numbered A1 through C3) recycle their NPC dialog.
| Island | Distance from Spawn | Key Feature | Recommended Arrival |
|---|---|---|---|
| Main Island | 0 studs (spawn) | Pizzeria, 12 houses, The Dump | Walk |
| Party Island | 280 studs east | Party tent, music stage, free pizza slices | Short swim |
| Rock Island | 830 studs southeast | Chest, revival altar, Mulberry the Witch | Hang glider |
| Far Reef | 1,100 studs south | Hidden coin spawn, no fast-travel | Long glide + swim |
The complete island tour typically takes 12 to 15 minutes if you do not stop to farm, and 25 to 30 minutes if you grab the Rock Island chest, revive a pet, and return. Veterans treat the tour as a first-five-minutes checklist for new characters, because every named island holds at least one item or event hook that the mainland hides.
Party Island in Detail
Party Island is the smallest of the named islands and the easiest to reach. It is a wooden platform with a striped tent, a music stage, and a free pizza slice that respawns every 90 seconds. The island has no doors, no manager, and no quests — it exists purely as a social hub and a rest stop. Players who only want a short swim usually start here before attempting the longer Rock Island crossing.
Rock Island in Detail
Rock Island is the second-largest landmass and the only one with a permanent NPC. Mulberry the Witch stands beside the revival altar, and the Rock Island Chest sits beneath the central rock arch. The chest contains roughly 1,500 coins on a fresh pull, and the altar revives any dead pet for the standard coin fee. The full breakdown of chest contents and pet revival tiers lives in the Rock Island chest guide, which complements the tour by covering the reward economy in detail.
Far Reef in Detail
The Far Reef is a half-submerged outcrop about 1,100 studs south of spawn. It has no chest, no NPC, and no fast-travel pad, but a single hidden coin bag respawns on its highest rock every 12 minutes. The Far Reef is mostly a vanity destination for completionists, and reaching it requires chaining a hang glider deploy from Rock Island with a final 60-stud swim.
House Map Numbers A1 to C3 and Delivery Routing
The 12 player houses are arranged in a strict grid behind the pizzeria, and every delivery driver learns the layout within their first shift. Each house carries both a letter (A, B, or C) and a number (1, 2, or 3), and the grid orientation never changes between servers. Knowing the delivery map numbers saves time on every combo run.
| Row | House 1 | House 2 | House 3 |
|---|---|---|---|
| A (north) | A1 — closest to The Dump | A2 — center north | A3 — closest to dock |
| B (middle) | B1 — center west | B2 — dead center | B3 — center east |
| C (south) | C1 — closest to beach | C2 — south center | C3 — closest to south dock |
The house upgrade ladder, price per tier, and furniture caps are covered in the house upgrades list, but the grid itself is what delivery drivers need. Most managers call out house numbers using the letter-then-number format (for example, "delivery to B2"), and a new driver can shave 10 to 15 seconds off every combo by memorizing the A-to-C row order.
Delivery Combo Math Across the Grid
A combo delivery pays a small bonus for every additional pizza dropped in the same run, and the optimal combo is a triangular sweep of A1, B2, and C3 — the three corner houses that are each about 60 studs from the central B2 pivot. From B2, the driver can reach any of the three corners in under 12 seconds on foot, which keeps the combo timer alive and stacks the bonus on every drop.
| Combo Shape | Houses Visited | Average Time | Bonus Tier |
|---|---|---|---|
| Triangle | A1 → B2 → C3 | ~36 sec | Highest |
| Row sweep | A1 → A2 → A3 | ~28 sec | Medium |
| Column sweep | A1 → B1 → C1 | ~30 sec | Medium |
| Random walk | Any 3+ houses | Variable | Lowest |
The complete delivery playbook, covering the correct boxes to grab from the supply station, how to read the order bubble above each customer’s house, and which gear or vehicle upgrades help, is available in the delivery route guide, which pairs naturally with the grid map above for hands-on players.
Hang Glider Wind Windows and Glide Path Tuning
The hang glider behaves differently depending on where you deploy it, because each band of water off the main island reads a different wind signature that interacts with the glider's pitch and drift. There are three distinct wind zones — the calm dock band, the steady mid-channel tailwind, and the turbulent reef zone past 400 studs — and reading them turns an inconsistent glide into a reliable one. New pilots should hover the camera over the surface and look for the visible ripple pattern: smooth water near the dock, streaked water mid-channel, and white-cap chop at the reef edge, since that visual cue matches the data in the table below. Pairing the right zone with a 60-stud launch point typically closes the Rock Island crossing in roughly 35 seconds.
| Wind Zone | Coverage | Effect on Glide | Best Use |
|---|---|---|---|
| Dock zone | 0–100 studs offshore | Calm, predictable | First launch, learning the controls |
| Mid-channel zone | 100–400 studs offshore | Steady tailwind, +2 studs/sec | Long cross to Rock Island |
| Reef zone | 400+ studs offshore | Turbulent, occasional downdrafts | Final approach, slow descent |
The mid-channel zone is the sweet spot for the glide to Rock Island. Deploy at around 60 studs offshore, coast through the mid-channel tailwind, and you will cover the full crossing in roughly 35 seconds without touching the swim stamina bar. Veterans who skip the dock zone and deploy from the ramp itself almost always clip the glider into the dock and waste a launch.
Compensating for Crosswinds Near Rock Island
The last 100 studs before Rock Island sit inside the reef zone, where the wind shifts unpredictably. Aim about 10 degrees higher than the rock spire during this final stretch to compensate for the average downdraft, and you will land on the eastern pad most of the time. Players who aim directly at the spire tend to undershoot and land in the water below the western cliffs.
Common Mistakes on the First Water-Setting Run
The detailed water setting in Work at a Pizza Place is forgiving once you understand the Swim/Glide toggle mechanic, but most first runs stumble on the same handful of setup errors before the Rock Island glide even begins. New players frequently forget to rebind Swim to mouse scroll and Glide to right-click, deploy the glider from the wrong dock tile, or swim straight into the 15-degree northeast current that pushes them onto a sandbar, and each of those mistakes adds 20 to 45 wasted seconds before the Rock Island tour can start.
-
Forgetting to re-enable the setting after a server hop. The toggle resets per session, so veterans re-bind Swim to scroll and Glide to right-click the moment they spawn.
-
Deploying the glider from the dock ramp. The dock geometry clips the glider and drops you straight back into the water. Swim out 40 to 60 studs first.
-
Ignoring the northeast current. Swimming straight toward Rock Island ends on a sandbar. Aim 15 degrees southwest of the target.
-
Stamina blackouts on the 830-stud direct swim. Plan a mid-swim glider burst, or skip the swim entirely and glide from the start.
-
Landing on the wrong Rock Island cliff. The eastern pad has the cutscene ring. The western cliffs do not, and climbing back up costs 30 to 40 seconds.
Stringing the five corrections together — re-binding the Swim/Glide toggle on spawn, deploying the glider past the 40-stud dock clip, offsetting 15 degrees southwest against the northeast current, planning a stamina burst for the 830-stud channel, and aiming for the eastern pad's cutscene ring — collapses a 90 to 120-second opening into that 35-second glide, and repeating that glide every shift is what unlocks the full Work at a Pizza Place delivery map, the houses A1 to C3 routing, and the all-islands tour loop without eating into pizza-stacking XP.
The Drive-Thru Secret and How It Connects to the Water Route
The drive-thru secret is a half-flooded basement under the front parking lot, accessible through a vent behind the dumpster. It contains a row of retro vending machines that dispense free drinks every 10 minutes, and a side corridor that exits onto the beach south of the main dock. The corridor exit is only 210 studs from the Secret Tunnel mouth across the water, which is why the drive-thru secret is the preferred warm-up spot for any player about to attempt a long swim or glider run.
The vent, the vending room, and the corridor exit are all mapped in the drive-thru secret guide, which pairs naturally with the Krusty Krab water setting since the corridor exit offers one of the cleanest launch points on the entire map for fast customer delivery routes.
Why the Drive-Thru Exit Beats the South Dock
The south dock requires a 40 to 60 stud warm-up swim before the glider is safe to deploy. The drive-thru corridor exit drops you directly onto a sandbar, with the wind already at your back and the Rock Island spire clearly visible. For experienced glider pilots, the corridor exit is the faster launch point on every run.
Frequently Asked Questions
Does the detailed water setting affect paycheck income?
No. The setting only changes the water plane, the swim action, and the hang glider availability. Paychecks are tied to your job, your star rating, and any active event multipliers such as Double Time. Swimming and gliding do not pay coins directly, although they can save time on the way to the Rock Island chest.
Can I reach Rock Island without turning the water setting on?
No. Without the detailed water plane, the hang glider and the swim action are both hidden, and the boat spawns at the docks stay disabled. The only way to reach Rock Island is by water or by air, and both require the setting to be active. The mainland walkways end at the shoreline and you will fall through the world if you try to walk past the beach.
Is the hang glider faster than swimming for the direct Rock Island crossing?
Yes, by a wide margin. A direct 830-stud swim takes about 59 seconds and drains the stamina bar to zero. A clean hang glider glide covers the same distance in roughly 35 seconds and recovers stamina the entire way. Gliding is also safer because you stay above the wave plane and avoid the mid-ocean current drift.
Do the house numbers A1 to C3 change between servers?
No. The house grid is part of the main island layout and never shifts. A1 is always the house closest to The Dump, and C3 is always the house closest to the south dock. The grid orientation is fixed so that delivery drivers can build muscle memory across sessions.
Can I complete a full island tour in under 10 minutes?
Yes, with a clean glide from the south dock to Rock Island, a quick chest pull, and a single glider return. The record for a full four-island tour is around 8 minutes, set by community players who chain the glider launches without ever touching the swim action. The average player completes the tour in 12 to 15 minutes on a first attempt.