
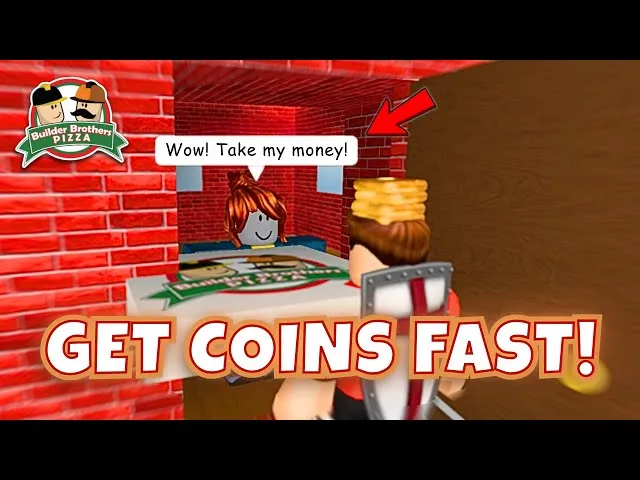
Your first hour in Work at a Pizza Place decides whether you spend the next month grinding for a couch or actually building coin. Most new players log in, hop on Cashier, deliver a couple of pizzas, and wonder why their wallet looks empty. The trick is not grinding harder; it is stacking small, repeatable habits that compound across every shift. This complete guide turns your first session into a system you can keep using long after the starter paycheck runs out, and it is built from the same habits veteran servers rely on every day.
What To Do First When You Log In
The first ten minutes of a Work at a Pizza Place session shape the next two hours. Walk in blind and you bounce between jobs with no plan, which starves your Stars meter and your paycheck at the same time. Walk in with a short checklist and you set the floor for a productive shift from the very first request.
The 5-Minute Lobby Routine
Before you even touch a station, sort out three things in the lobby area: check the current Event Time banner, glance at the player count, and read the shift sign near the door. Events such as Double Time and Neon Time change how coins flow, because every normal order turns gold (20 coins) during Double Time and every order becomes neon (100 coins) during Neon Time, according to the community-maintained Work at a Pizza Place paycheck breakdown. If you spawn in during one of those windows, your plan has to change on the fly.
| Pre-Shift Check | What To Look For | Why It Matters |
|---|---|---|
| Event banner | Double Time / Neon Time / None | Multiplies your paycheck order value (2x or 10x) |
| Player count | Active servers vs. empty servers | More teammates = faster pipeline = bigger payouts |
| Manager sign | Who is bossing the floor today | Lets you plan around promotions or firings early |
| Your stars | Current star rating (0-3) | Determines the share of the team paycheck you collect |
Pick Your First Job, Not The First Station You See
New players almost always sprint to Cashier because the tip jar looks shiny. Cashier is fine, but it pays through tips, not through the team Paycheck, so it caps your star growth if you never touch a real station. A solid first-session loop is Cook or Pizza Boxer for the first 15 minutes, then a swap to Delivery once the kitchen queue is calm. That gives you a feel for the full pipeline, which is exactly what a starting guide should build first.
How Stars And Paychecks Actually Work
The economy in Work at a Pizza Place is a two-layer system: Stars (your personal reputation) and the Paycheck (the team pot that splits every 15 minutes). Beginners usually focus on one and ignore the other, which is why their wallets stall. Treat them as a pair and your coin curve starts looking very different after two or three shifts.
Star Tiers And What They Pay
Your star level is decided by the Manager, and it directly controls how much of the team paycheck you actually pocket. The community wiki entry on Jobs lists the payouts clearly: at 3 stars you take home 100% of your share, 2 stars pays 80%, 1 star pays 30%, and 0 stars pays 0% — which means a player who went on break without working any station skips the check entirely. This is the single biggest noob-to-pro unlock in the game.
| Star Level | Paycheck Share | Typical Path To Get There |
|---|---|---|
| 3 stars | 100% | Consistent work, no idle breaks, no AFK in lobby |
| 2 stars | 80% | Solid work but a couple of AFK moments |
| 1 star | 30% | Mostly on break, only short bursts of real work |
| 0 stars | 0% | Skipped the entire shift or only broke without working |
Paycheck Timing And Order Types
Paychecks land every 15 minutes for any player who worked, or who worked before going on break. Players who walked straight onto break without contributing skip that check. The order type matters a lot because it sets the value of each delivery, and the team pot is split by star share at the end of the cycle. The numbers below come straight from the Work at a Pizza Place paycheck page.
| Order Type | Coins Per Order | When It Appears |
|---|---|---|
| Normal order | 10 coins | Standard shifts |
| Gold order | 20 coins | Random spawns, or all orders during Double Time |
| Neon order | 100 coins | Rare spawns, or all orders during Neon Time |
| Fizzly drink | varies | Bonus for delivery runs |
VIP players stack another multiplier on top: +50% coins from each work paycheck and +100% from daily checks. That is a serious income edge once you decide to invest Robux, and the off-sale gamepasses breakdown is a good companion read if you are thinking about that step later.
The First-Job Rotation Every New Player Should Learn
Sticking to one station is the fastest way to burn out and the slowest way to grow your paycheck. The pros rotate through a tight loop, and once you have the loop down, every shift feels like muscle memory. The following rotation fits easily inside the 15-minute paycheck window, which is the natural rhythm of the game.
Cook → Pizza Boxer → Delivery (The Core Loop)
The classic three-station loop covers the full pipeline. Cook builds orders and racks up activity fast, Pizza Boxer packages the pies for pickup, and Delivery converts finished orders into the coins that show up in the next paycheck. Skipping the box station is a common mistake because boxes look like a nothing role, but the box station is what actually feeds the delivery queue.
| Step | Station | What You Do | Time Spent |
|---|---|---|---|
| 1 | Cook | Grab dough, sauce, cheese, toppings, oven | 4-5 minutes |
| 2 | Pizza Boxer | Box finished pies, place on the counter | 3-4 minutes |
| 3 | Delivery | Pick up orders, run them to the houses | 4-5 minutes |
| 4 | Repeat or swap | Reset your station, swap to Cashier or Supplier | 3-4 minutes |
When To Swap Stations Mid-Shift
The real noob-to-pro unlock is learning when to break the loop. Swap to Supplier if ingredients are running low and nobody else is doing it, because a kitchen that runs out of dough stalls the whole team. Swap to Cashier if the line is piling up and tips look fat, but only briefly — Cashier time does not grow your stars the way station time does. If you want a deeper breakdown of job swaps and which pairs work best, the job switching guide covers that in detail.
Daily Habits That Build Real Coin Gains
Coin gains in Work at a Pizza Place compound through routine, not through any single trick. Players who log in, do one paycheck cycle, and leave cap out at the daily check plus a small paycheck. Players who stack habits across the day clear a couch in a few sessions. The following habits are the ones that veteran players repeat without thinking, and each one is small enough to fit into the first 30 seconds of a shift.
Stack Paychecks With Daily Check Timing
The Daily Check is a separate payout that drops once per day, and it does not care about your star level. New players treat it as a bonus, but if you time it right after a long work cycle, it stacks with whatever paycheck landed last. The community wiki notes that the original starter paychecks handed out 500 coins, and while the modern value shifts, the principle stays: log in, work a full cycle, then claim the daily check while you still have stars.
| Habit | Frequency | Coin Impact |
|---|---|---|
| Full 15-minute work cycle | Every cycle | Pays the team paycheck share |
| Daily check claim | Once per day | Adds the daily bonus on top |
| VIP daily bonus | Once per day | +100% on top of the daily check for VIPs |
| Event alignment | When active | Multiplies every order during the window |
Manage Your Break Windows
Going on break is the silent killer of star growth, because every minute off-station pulls your star share down toward the 30% tier. The smartest habit is to take breaks after you have already worked a chunk of the cycle, so the paycheck still credits you even if your break runs long. A player who works for 10 minutes, breaks for 5, and works for 5 again still gets the full paycheck, while a player who breaks first and works later often walks away with nothing.
Use Event Windows As Coin Multipliers
Events are not random flavor; they are scheduled coin multipliers, and the difference between playing through one and ignoring one is massive. During Double Time, normal orders convert to gold (20 coins each), and during Neon Time, every single order becomes neon (100 coins each), which means a single delivery run can pay the same as ten normal runs. If you see an event banner the moment you load in, your priority is to be on a station that produces orders — Cook, Pizza Boxer, or Delivery — instead of wandering the lobby.
Manager Runs, Firings, And Career Progression
Eventually the routine stops being about coins and starts being about the role. Manager is the one job that does not pay through the regular paycheck, but it controls who gets fired and who gets promoted, which means it controls who keeps their stars. If you are aiming to run the floor, this section is the bridge between a starting guide and a career path.
How To Avoid Getting Fired
Firings in Work at a Pizza Place are quiet: a player can sit on 0 stars for a cycle, and the manager can drop them without warning. The most common cause is a long AFK stretch in the lobby, followed by a second AFK stretch inside the next cycle, because the game reads two quiet cycles in a row as a pattern. Keep at least one station hop per cycle, and you are effectively fire-proof during casual play. For a deeper look at first-day survival, the how to become manager walkthrough is the next logical read once you finish the basics here.
How To Earn The Manager Role
Managers are usually picked from the players with the highest star consistency, not the players with the most kills or the most deliveries. If you want the role, your best play is to keep your stars at 3 across multiple cycles, volunteer when the current manager logs off, and stay on station even when the lobby is empty. Empty servers are actually the easiest promotion windows, because the boss is often a player who has to leave, and the next best star in the room takes over.
| Manager Action | What It Does To You |
|---|---|
| Promote you to a station | Bumps you back to 3 stars if you were drifting |
| Fire you | Drops you to 0 stars and skips your next paycheck |
| Ignore you | No change, but the next cycle still counts your work |
Common Mistakes That Keep New Players Stuck
A noob-to-pro guide is not just about the right habits; it is also about dropping the wrong ones. Most players who feel stuck after a week are repeating the same three mistakes, and each one is easy to fix once you see it. Fixing these is often the difference between a 2,000-coin day and a 10,000-coin day, even on the same server.
Mistake 1: Camping Cashier All Shift
Cashier tips feel instant, which is why new players camp there. The problem is that Cashier is the only station that does not directly feed the team pot, so the team paycheck stays small, which means your star share multiplies a smaller number. Mix in Cook or Delivery time and your paycheck value climbs within one cycle.
Mistake 2: Ignoring The Event Banner
The event banner is the loudest signal in the lobby and the most ignored. Skipping a Double Time window to goof around is essentially throwing away the easiest paycheck boost in the game, and skipping a Neon Time window is even worse because neon orders are 10x a normal order. Always read the banner before you pick your first station.
Mistake 3: Breaking Before Working
The paycheck logic credits players who worked before they broke, which means a player who works 5 minutes and breaks 10 still gets the full cycle. A player who breaks 10 and works 5 gets nothing, because the break happened first. The fix is simple: station first, break second, every single cycle. If you want a fuller list of hidden traps, the mistakes to avoid guide lines up well with this habit list.
Putting It All Together: A 30-Day Noob-To-Pro Plan
Habits only work if you stack them over time, and a 30-day plan is a clean way to see the curve. The plan below is built around the paycheck cycle, so each day fits cleanly into one or two sessions. Stick to the rhythm and the coin gains start compounding on their own, because every habit feeds the next one.
| Day Range | Focus | Key Habit To Lock In |
|---|---|---|
| Day 1-3 | Learn the pipeline | Run the Cook → Boxer → Delivery loop until it is automatic |
| Day 4-7 | Protect your stars | Avoid going on break before working, hit 3 stars every cycle |
| Day 8-14 | Time the events | Log in during Double Time and Neon Time, plan sessions around them |
| Day 15-21 | Manage your breaks | Work first, break second, take shorter breaks per cycle |
| Day 22-30 | Aim for Manager | Hold 3 stars for two cycles, volunteer for the role on quiet servers |
By the end of the first month, the daily check plus a few full paychecks should easily cover a small house item, a couch, or a starter gamepass if you decide to invest. The deeper payoff is that every habit you built during this month still works six months from now, even after the meta shifts, because they are rooted in how the paycheck and star systems actually work rather than in any single trick.
A good way to test the plan is to revisit the official Work at a Pizza Place game page every official Work at a Pizza Place game pageunning the same loop. If you want a broader snapshot of the meta and how the 2026 updates changed things, the complete 2026 guide is the best companion read.
Frequently Asked Questions
What should I do first as a brand new player in Work at a Pizza Place?
Start by checking the event banner in the lobby, then run the Cook → Pizza Boxer → Delivery loop for at least one full 15-minute paycheck cycle. This builds your stars, lets you feel the full pipeline, and gets your name on the first paycheck, which is the foundation every habit in this starting guide builds on.
How do I keep my 3-star rating and avoid losing my paycheck share?
Work a meaningful chunk of every paycheck cycle before you take a break, because the system credits players who worked before they went on break. Avoid long AFK stretches in the lobby, keep at least one station hop per cycle, and your star share will stay near the 100% tier the community wiki describes.
When are Double Time and Neon Time worth chasing?
Both events are worth chasing any time they pop, because they multiply the value of every order your team produces. Double Time converts all normal orders into 20-coin gold orders, and Neon Time converts them into 100-coin neon orders, which is a 10x swing per delivery during a single cycle.
Is becoming Manager actually worth it for the coin?
Manager does not pay a separate paycheck, but it controls who keeps their stars and who gets fired, which means it indirectly protects your income. For players who want a long-term career path in the game, Manager is the best way to keep your shifts stable and your star share high across every session.
Can I make real progress without spending Robux?
Yes. The full noob-to-pro path in this guide is built around free habits, and the daily check plus consistent paychecks will cover most house items over a month of play. Robux purchases like VIP speed up the curve, but they are not required to reach the same milestones, which is why a new player guide can be 100% free if you stick to the loop.